ADA Bracket Spring Clip Installation
Make ADA Bracket Spring Clip Installation a Breeze
When it comes to installing ADA-compliant panels, precision and reliability matter. A properly installed bracket spring clip system ensures that your face panels are secure, aligned, and easy to maintain over time. Whether you're working on commercial restrooms, partitions, or accessibility upgrades, this system is designed to simplify installation while delivering a clean, professional finish.
At A&M Hardware, we understand that installers need solutions that are both dependable and efficient. These spring clips are engineered to provide a snug fit over brackets, reducing movement and ensuring long-term performance even in high-traffic environments.
Where This System Is Used
ADA bracket spring clips are commonly used in a variety of commercial and institutional settings where accessibility and durability are critical. These include:
- Public and commercial restrooms
- Office buildings and corporate facilities
- Healthcare environments and hospitals
- Schools and universities
- Retail and hospitality spaces
In these environments, panels must not only meet ADA compliance standards but also withstand frequent use. This clip system allows for secure mounting while still enabling easy panel removal for maintenance or repairs when needed.
Why Proper Installation Matters
Taking the time to install your spring clips correctly can save significant time and cost down the line. Proper placement ensures:
- Consistent panel alignment for a clean, professional appearance
- Secure attachment that minimizes shifting or loosening over time
- Ease of removal and reinstallation for maintenance access
- Compliance with ADA standards, helping you avoid costly corrections
Even small measurement errors can lead to misalignment or difficulty fitting the panel onto the bracket, so following the guidelines closely is key.
Simple Breakdown For Installation
This system works using two connected components that must be installed in the correct order:
1. Brackets (Installed First)
- Mounted to the wall, partition, or structure
- Fixed in place and properly spaced
- Act as the anchor point for the panel
2. Spring Clips (Attached to Panel)
- Screwed onto the back of the face panel using the specified measurements
- Designed to snap over the installed brackets
How They Work Together
Once both components are installed:
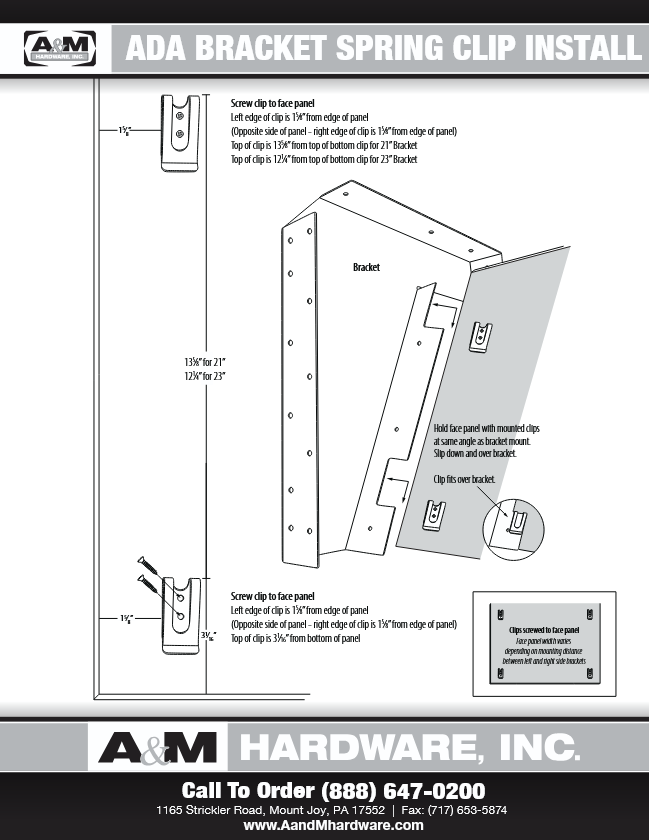
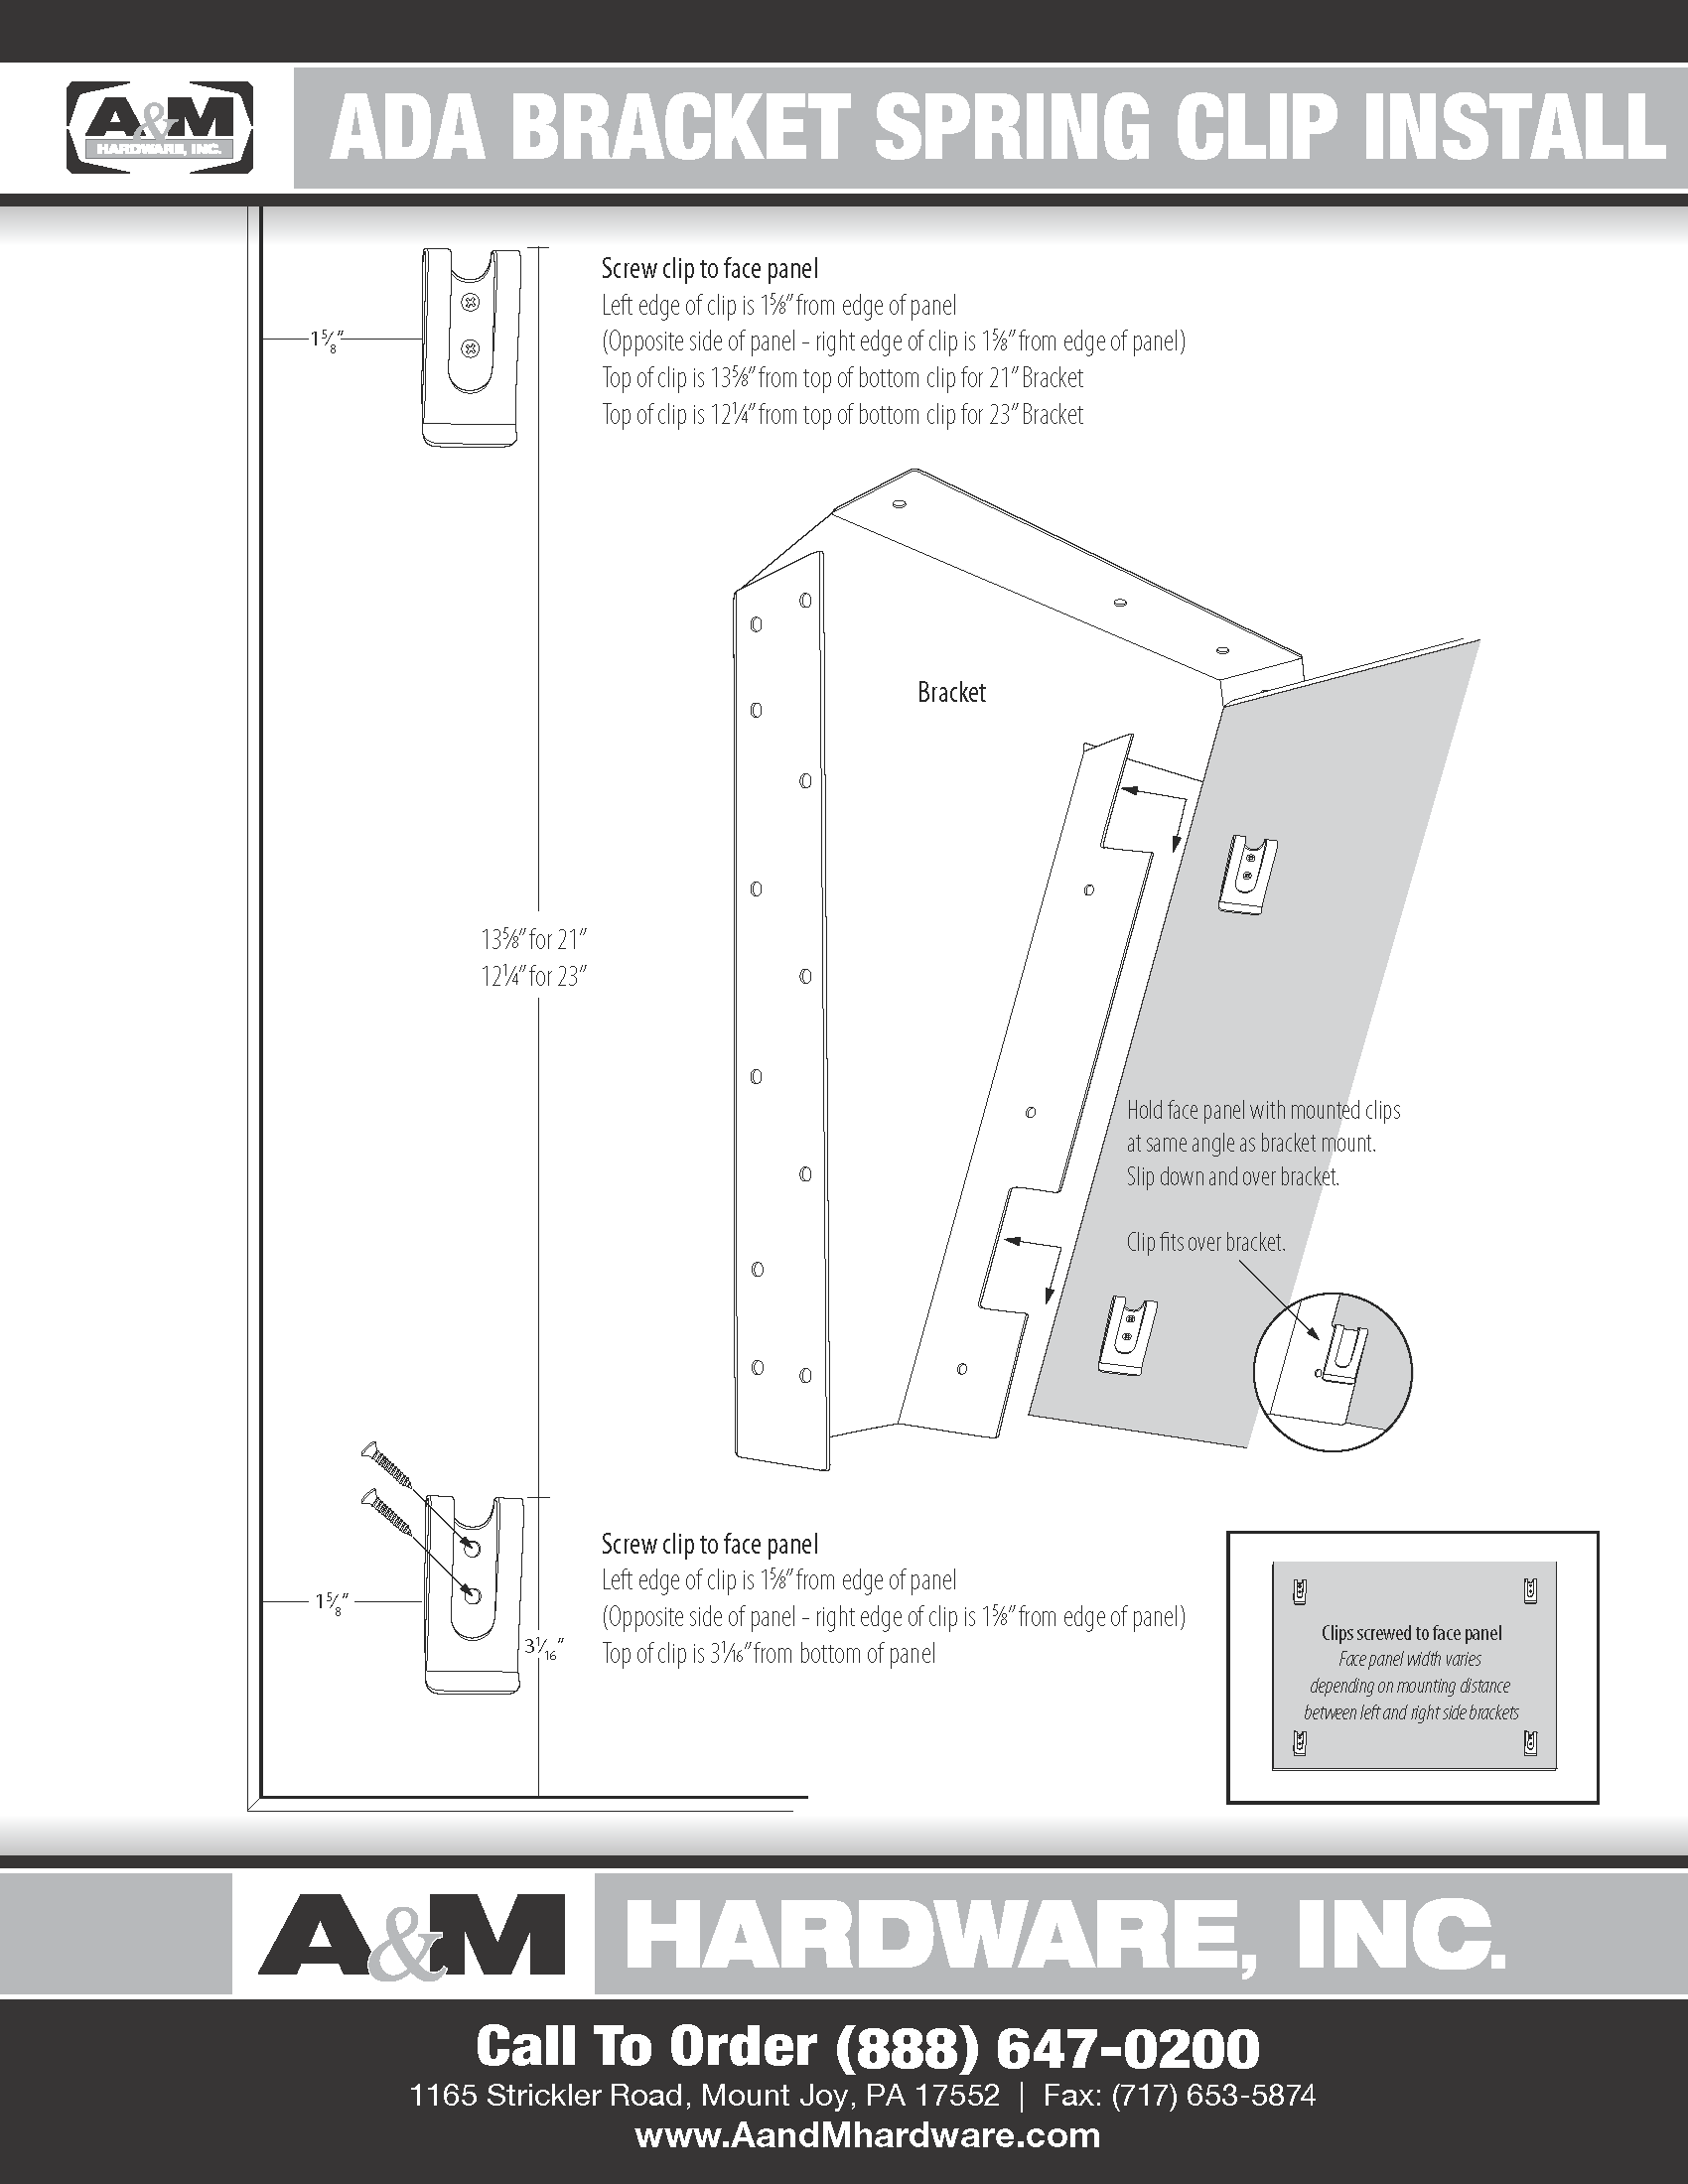
- Hold the panel at the same angle as the brackets
- Align the clips with the brackets
- Slide the panel downward
- The clips will snap securely over the brackets, locking the panel in place
Important Note
**If brackets are not already installed, they must be mounted first before attaching the panel.
Key Measurements & Placement
Download BrochureHorizontal Placement
- Left edge of clip: 1 5/8 inches from edge of panel
- Opposite side: Right edge of clip: 1 5/8 inches from panel edge
Vertical Placement (Bottom Clip)
- Top of clip: 3 1/16 inches from bottom of panel
Vertical Placement (Top Clip)
- For 21 inch bracket: Top clip positioned 13 5/8 inches above bottom clip
- For 23 inch bracket: Top clip positioned 12 1/4 inches above bottom clip
Installation Instructions
Step 1: Attach Clips to Face Panel
Securely screw the clips to the face panel using the measurements above. Make sure each clip is straight and evenly spaced to ensure proper engagement with the bracket.
Step 2: Confirm Panel Width
Before mounting, verify that your panel width matches the spacing between the installed brackets. This step is essential for a proper fit and smooth installation.
Step 3: Position the Panel
Hold the face panel at the same angle as the mounted brackets. This alignment is key to allowing the clips to engage correctly without forcing the panel into place.
Step 4: Install Panel onto Brackets
Gently slide the panel downward so the clips move over the brackets. When properly aligned, the clips will snap securely into place, holding the panel firmly.
Real-World Installation Insight
In the field, installers often appreciate how this system balances strength with flexibility. The spring clip design allows for a tight hold while still making it possible to remove panels without damaging surrounding materials. This is especially valuable in environments where access behind the panel is occasionally required.
Additionally, because the system relies on consistent measurements rather than complex hardware, it reduces installation errors and speeds up project timelines.
Why Choose A&M Hardware
A&M Hardware has been a trusted partner for contractors, builders, and facility managers for decades. Our products are built with durability and ease of installation in mind, helping you complete projects efficiently without sacrificing quality.
When you choose A&M, you’re getting more than just hardware, you’re getting proven solutions backed by industry expertise.
Need Help or Ready to Order?
Call our team today at (888) 647-0200 for product support, ordering, or installation guidance. We’re here to help you get the job done right.
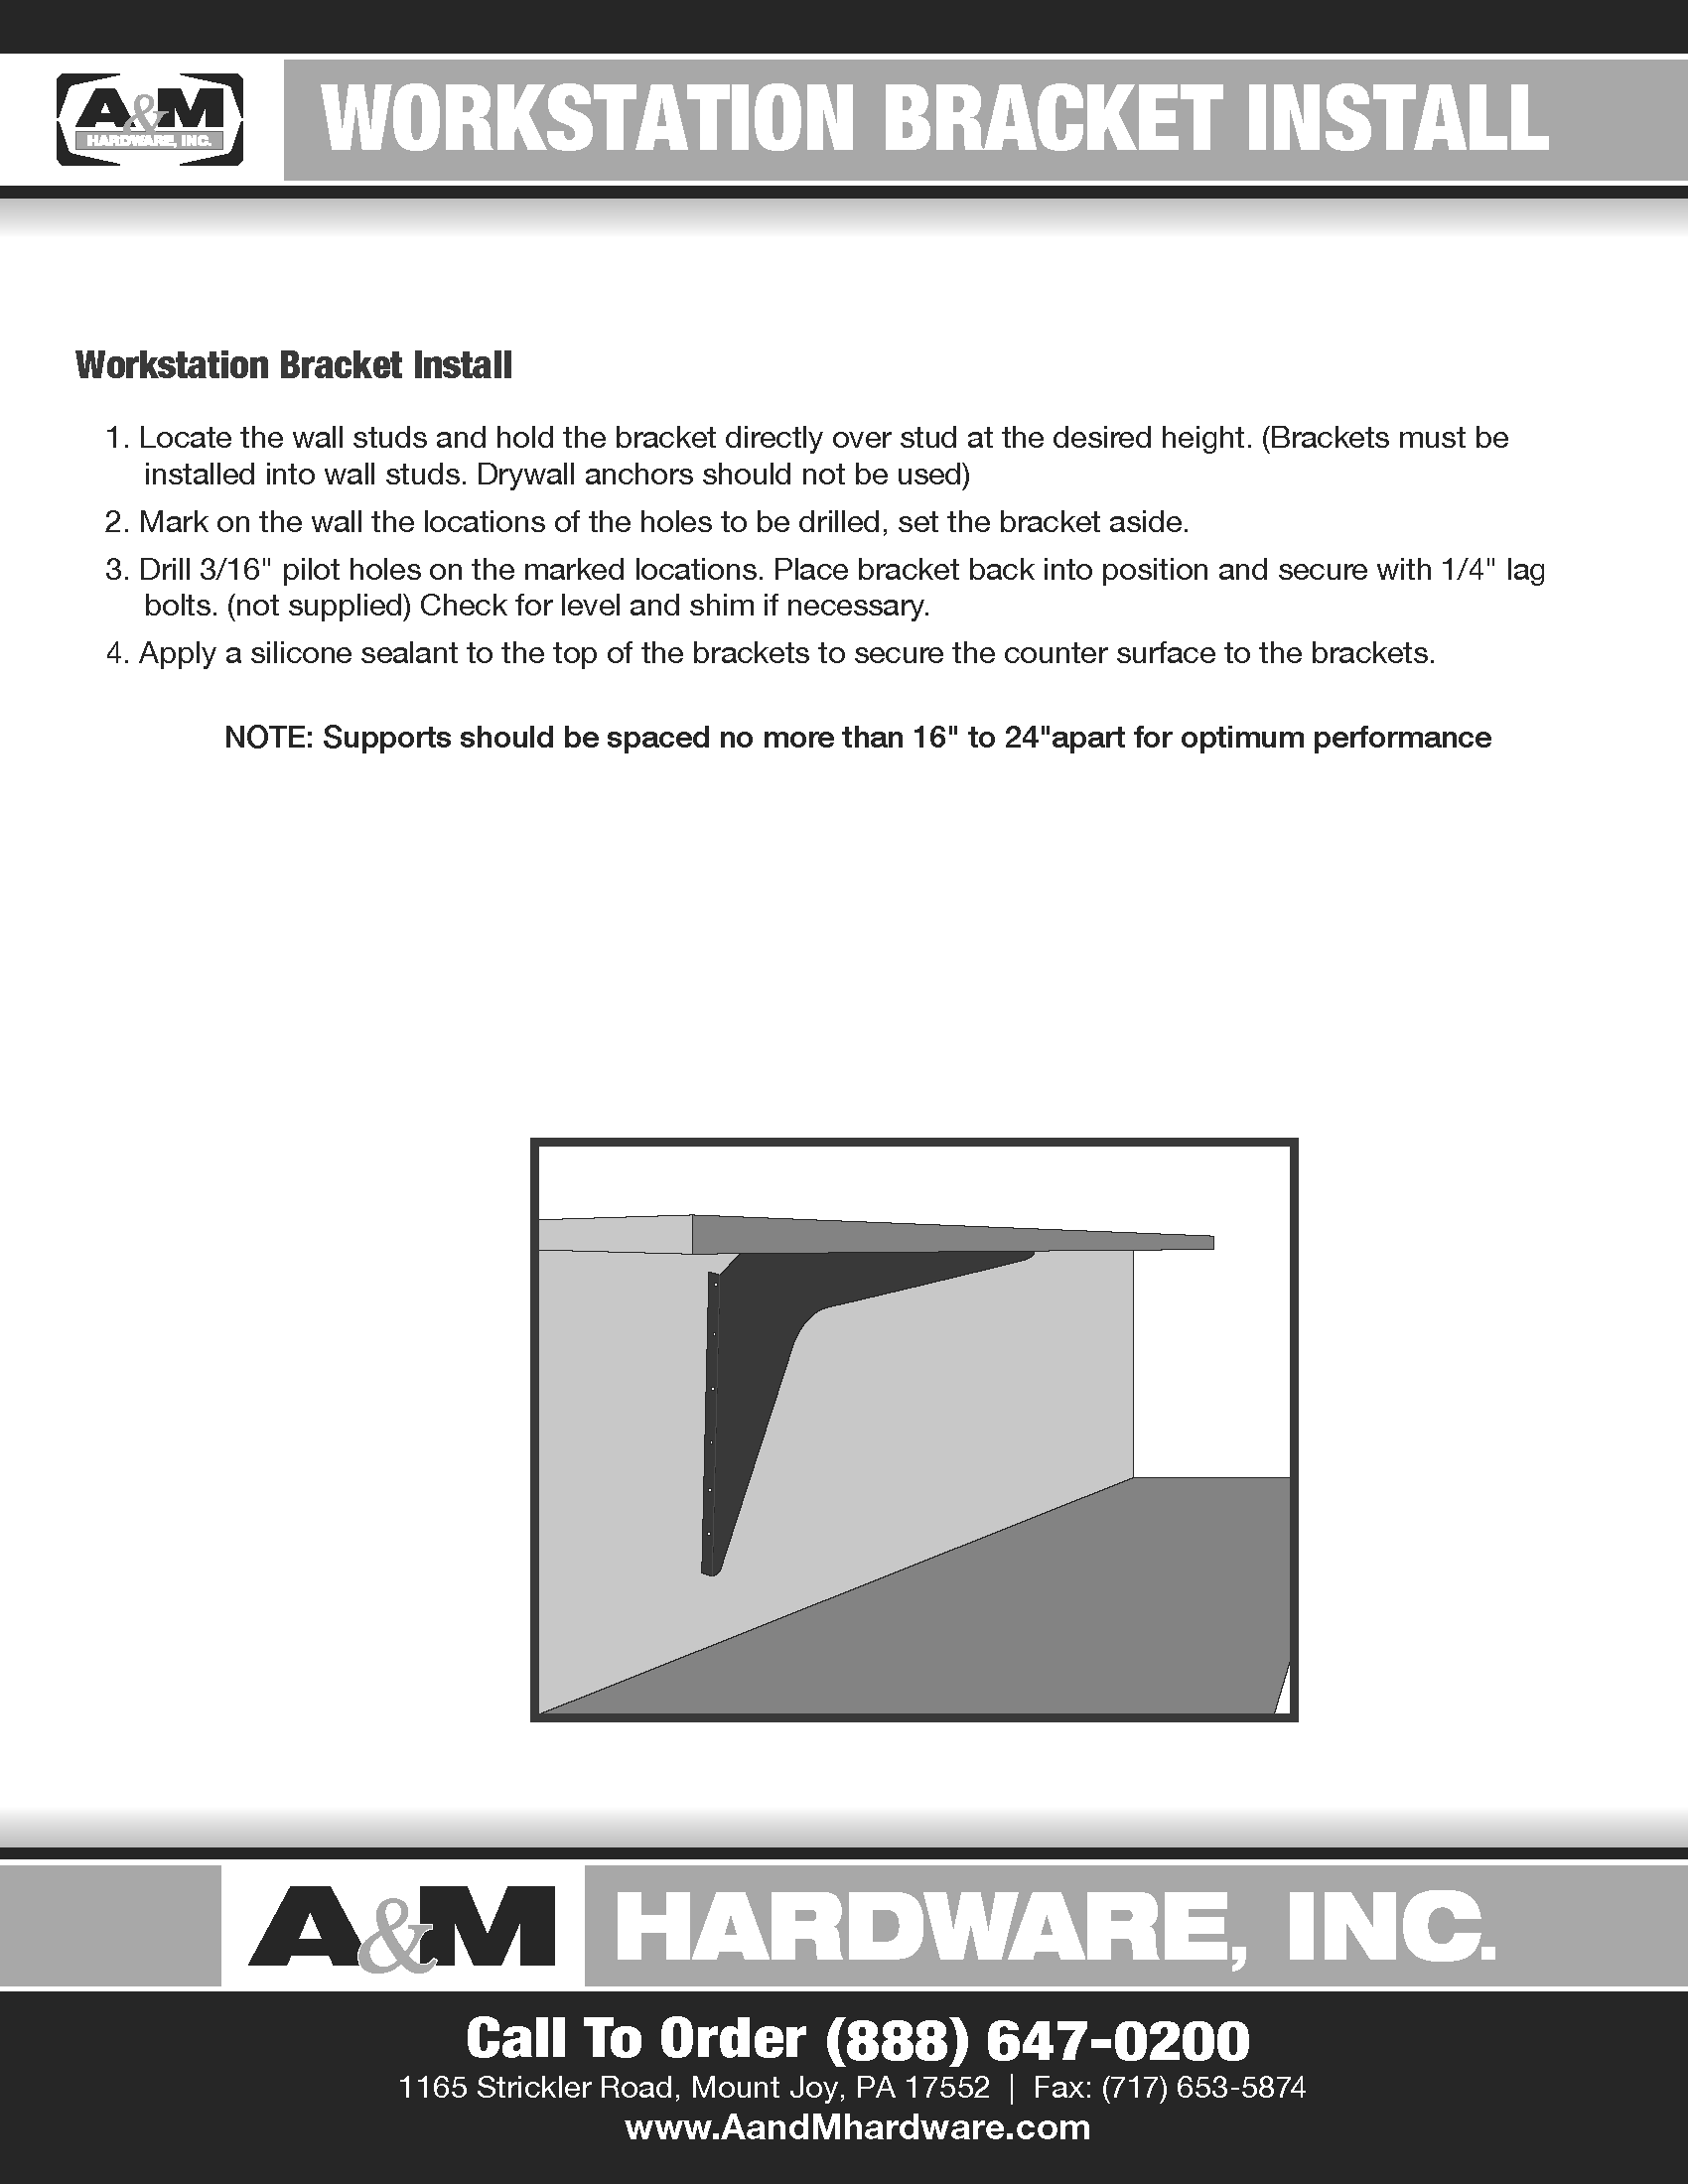
All Bracket Installation
ADA Bracket Clip Installation
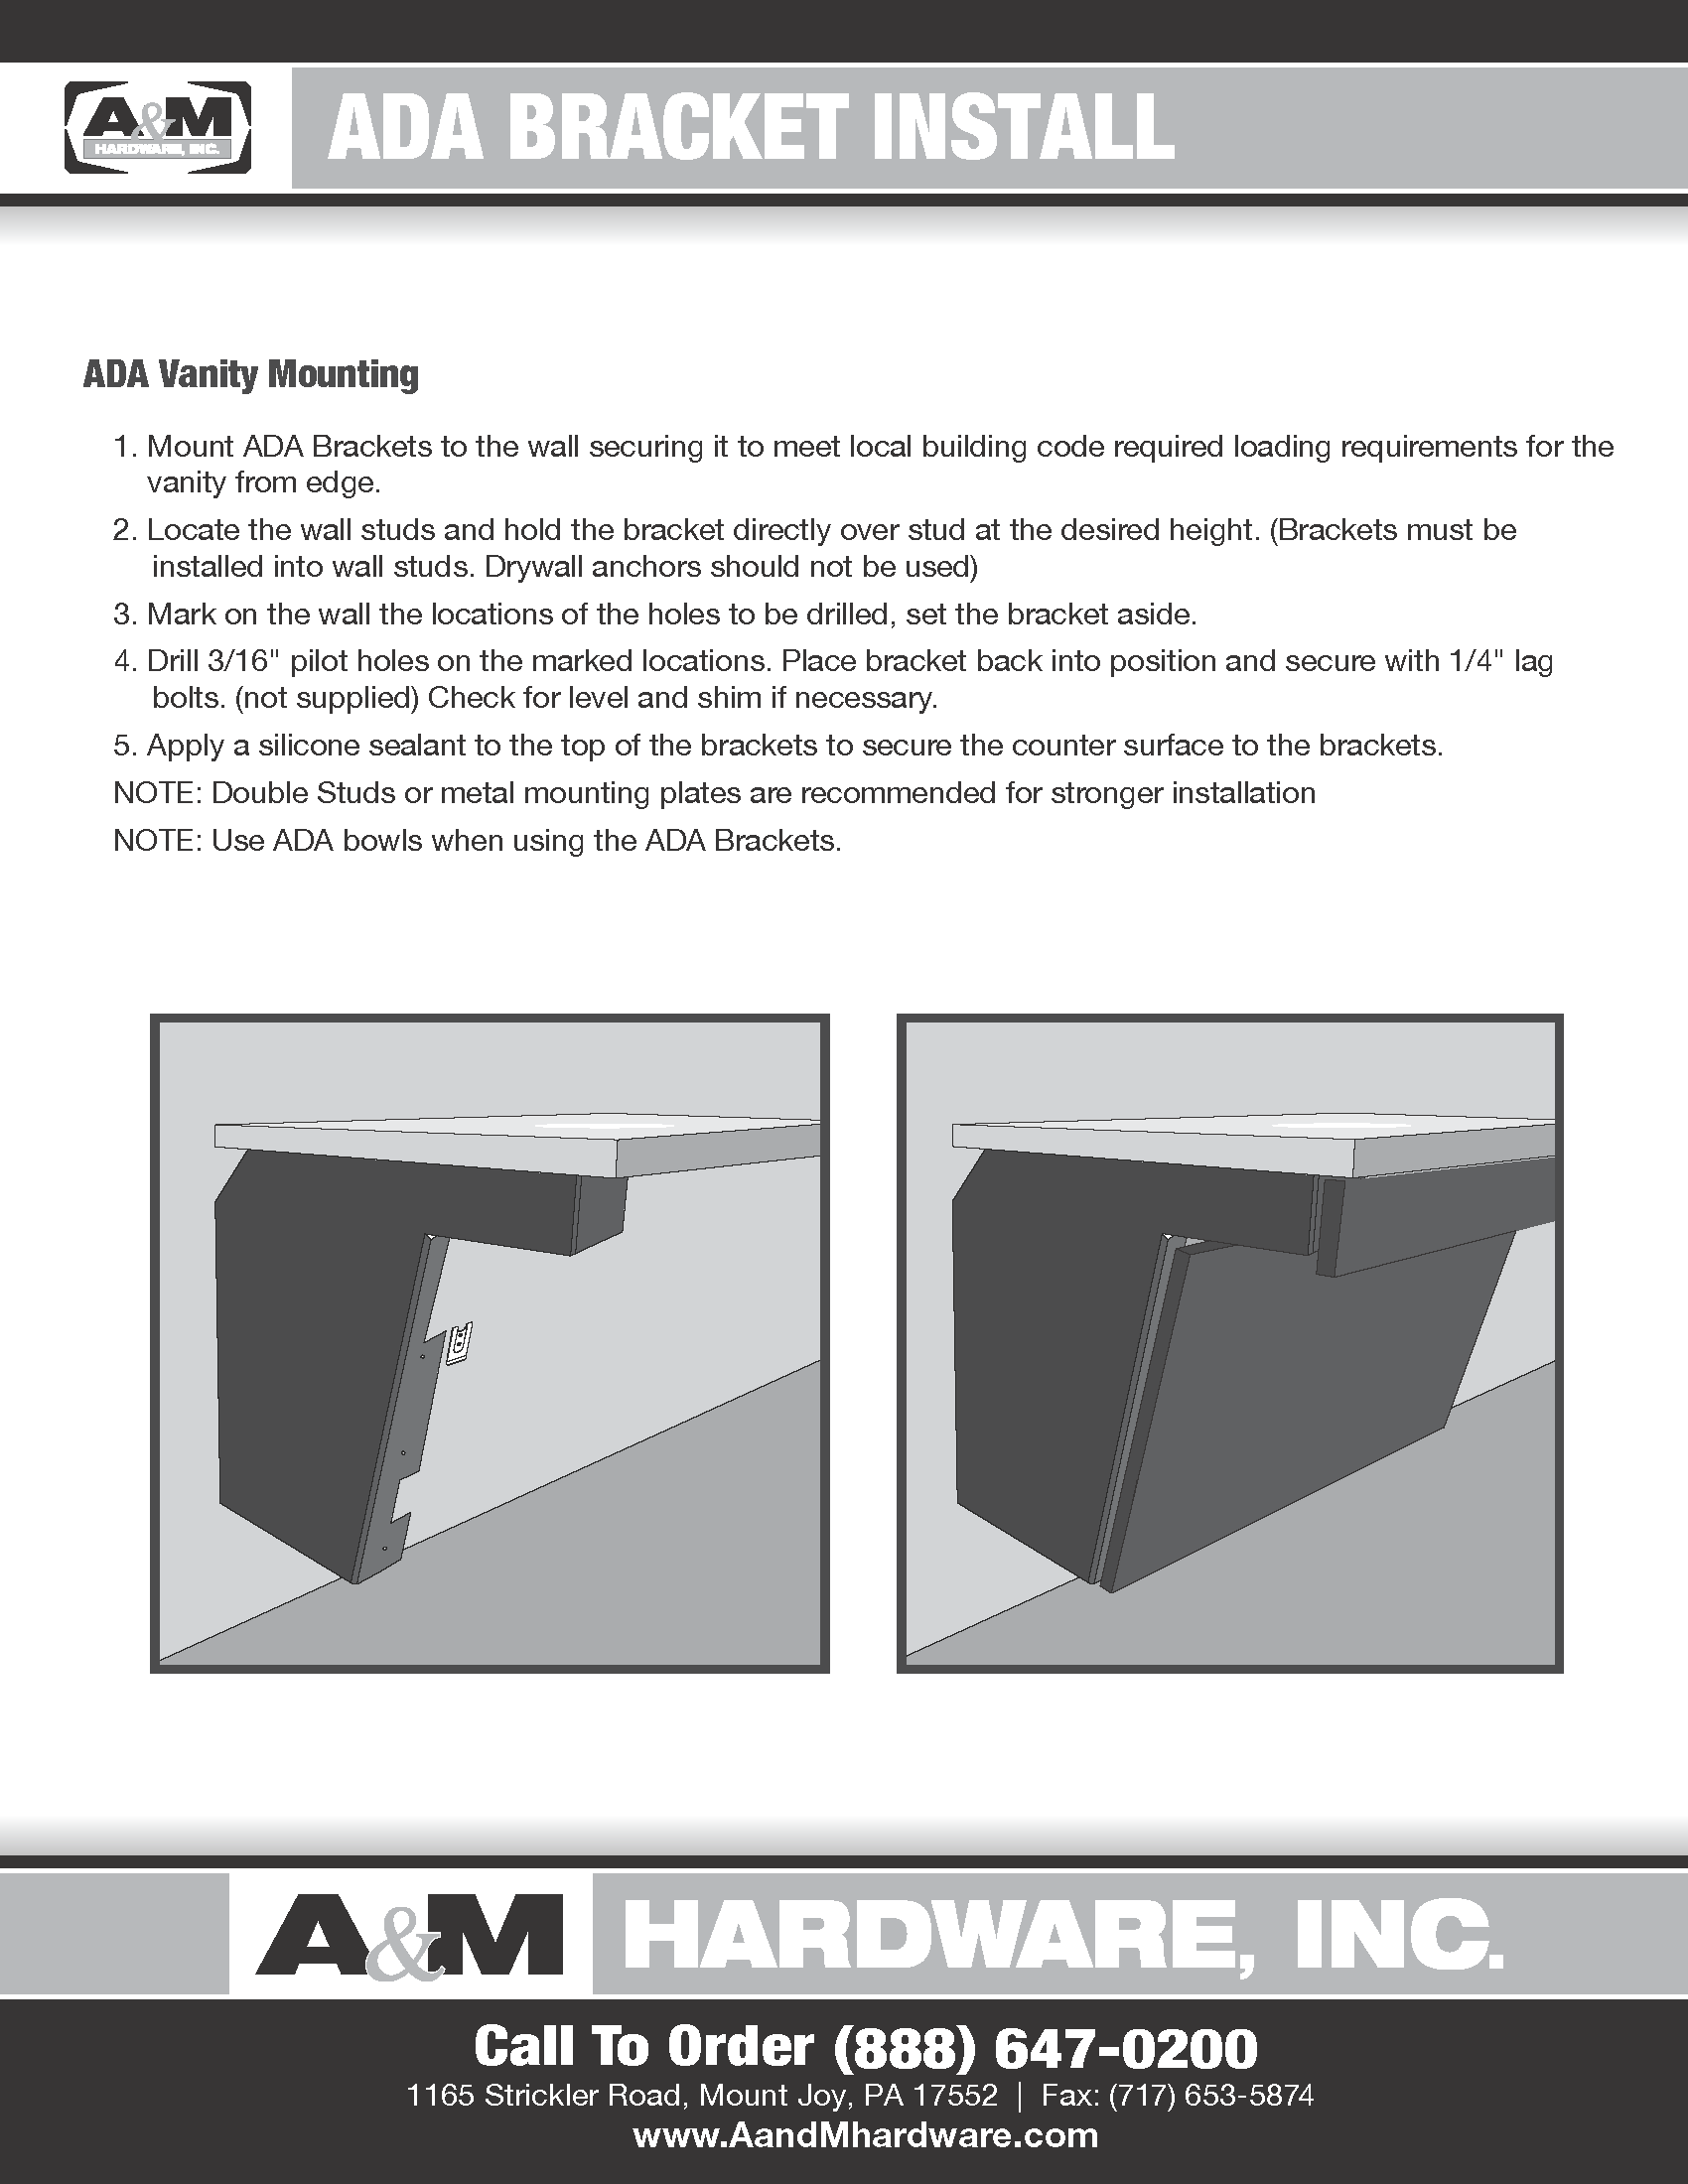
ADA Vanity Bracket Installation
C-EC Bracket Installation
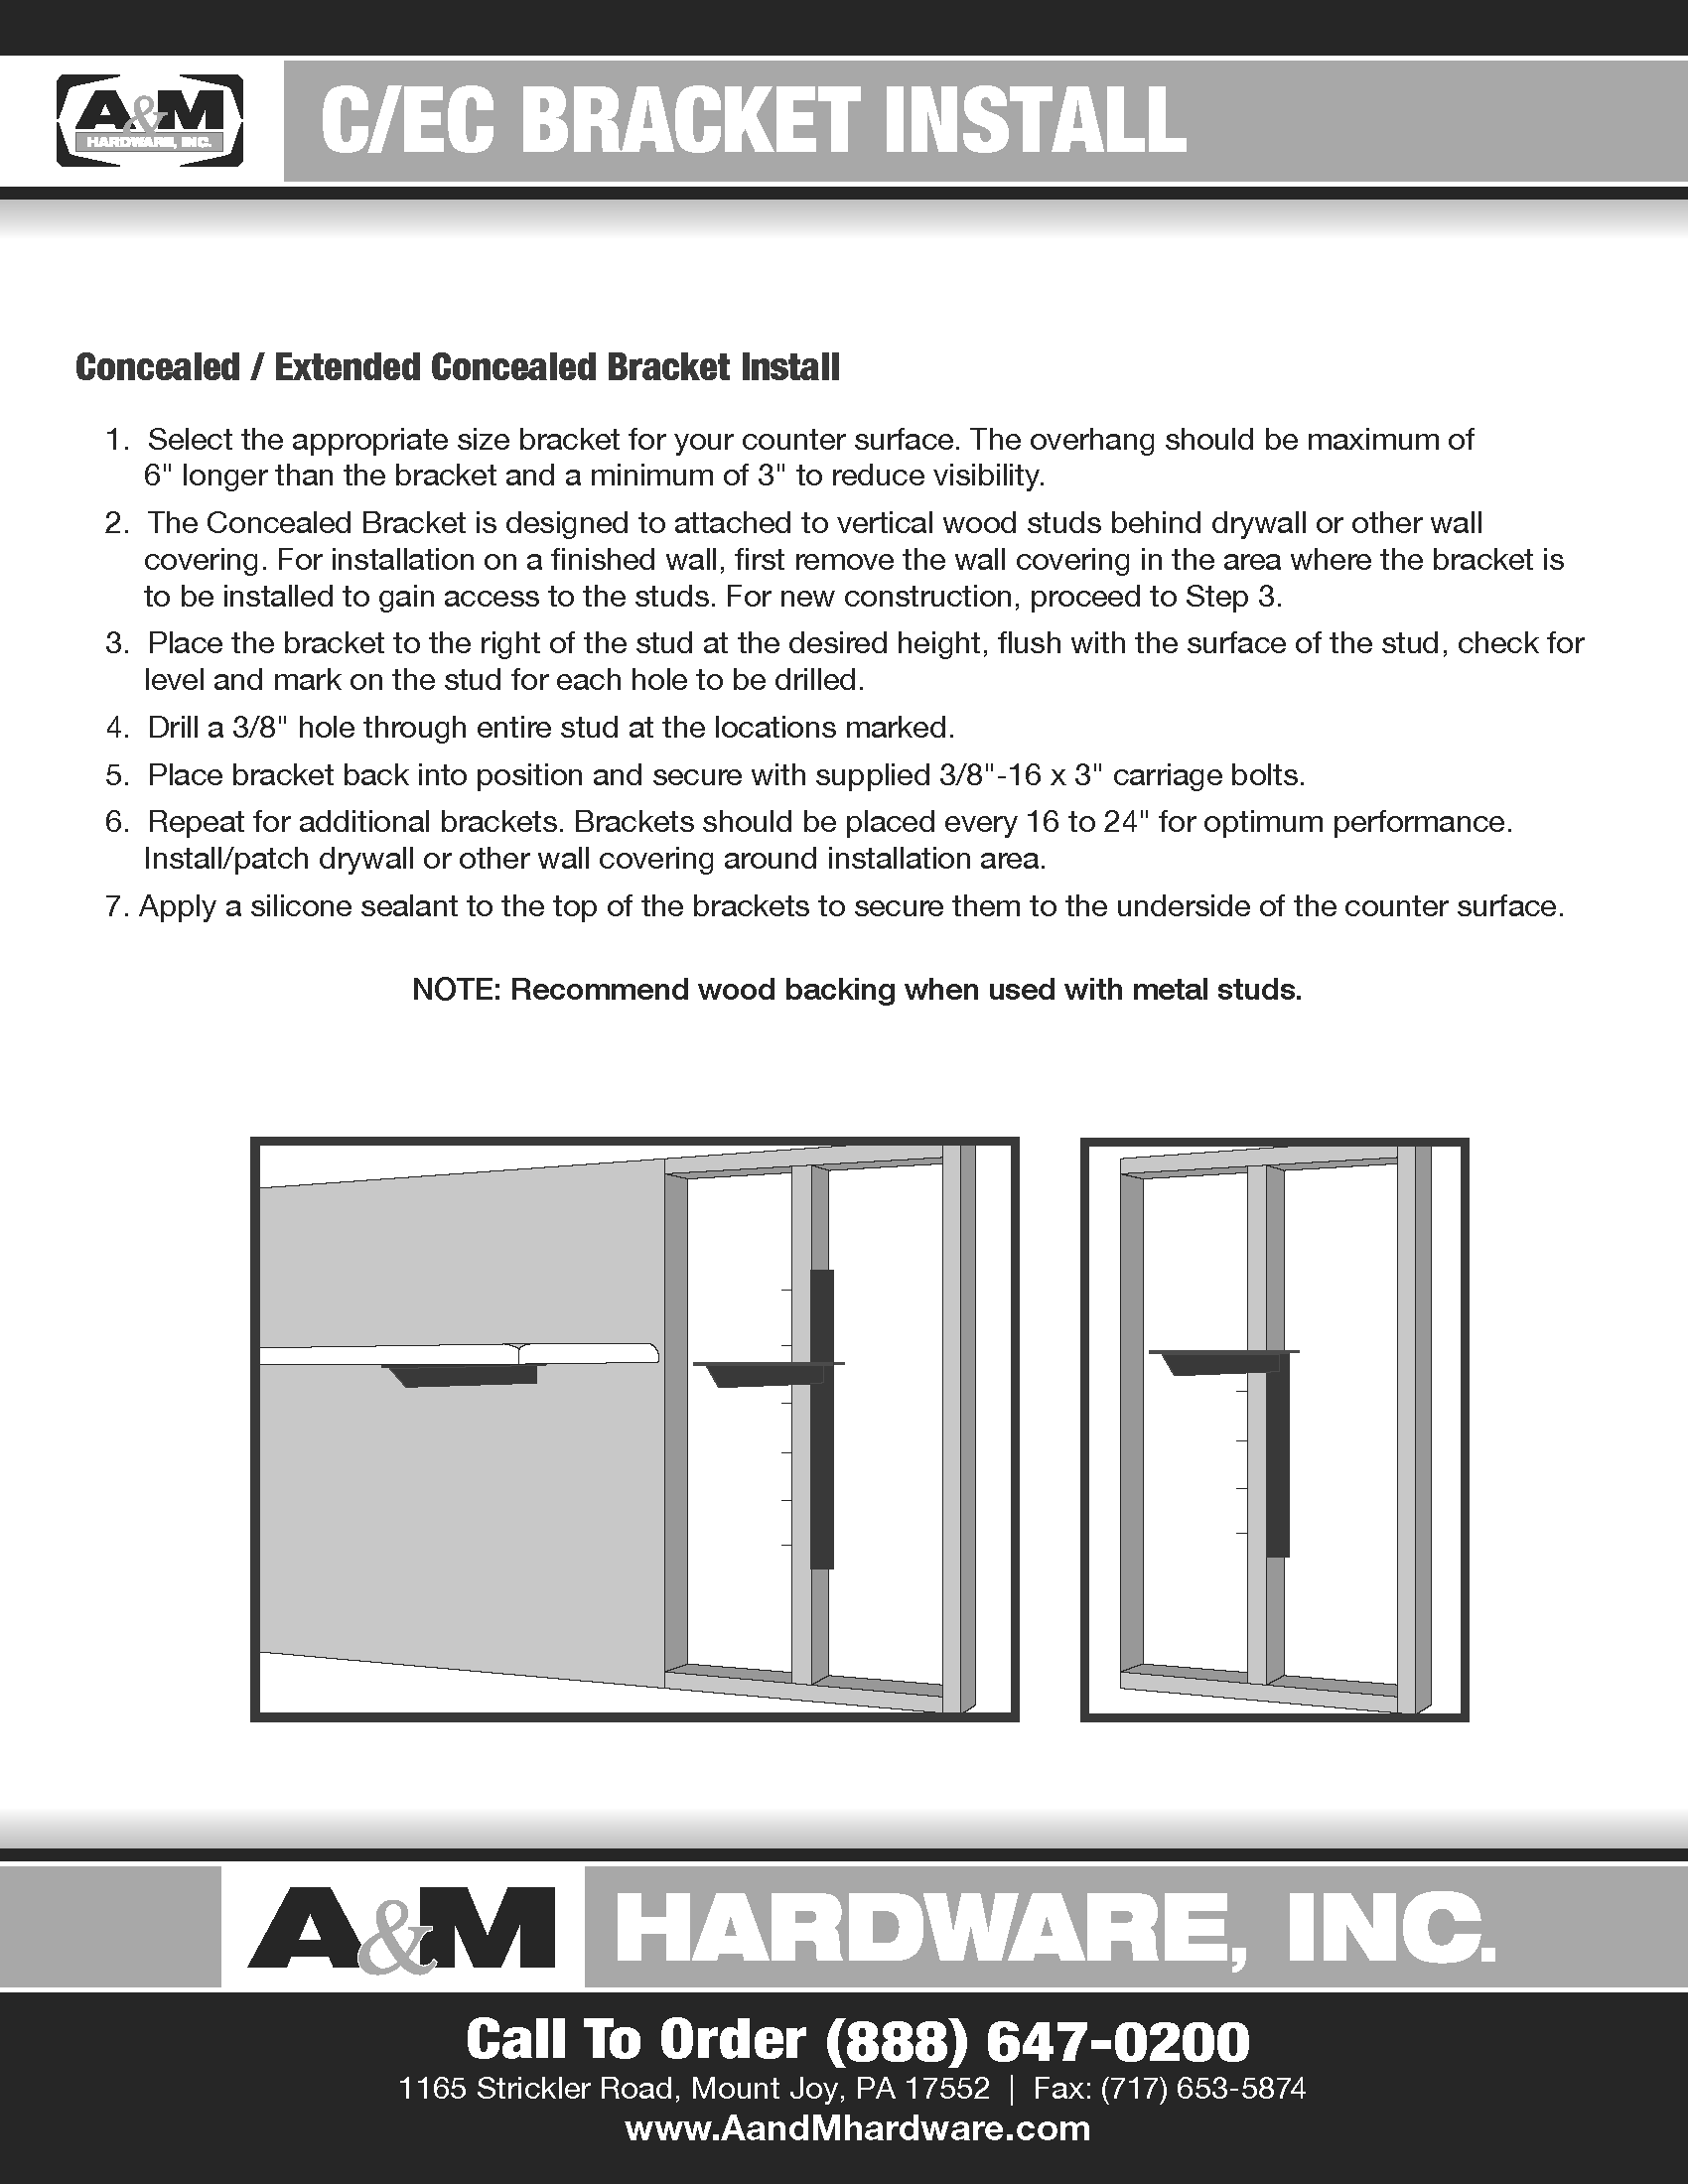
Hybrid Bracket Surface Installation
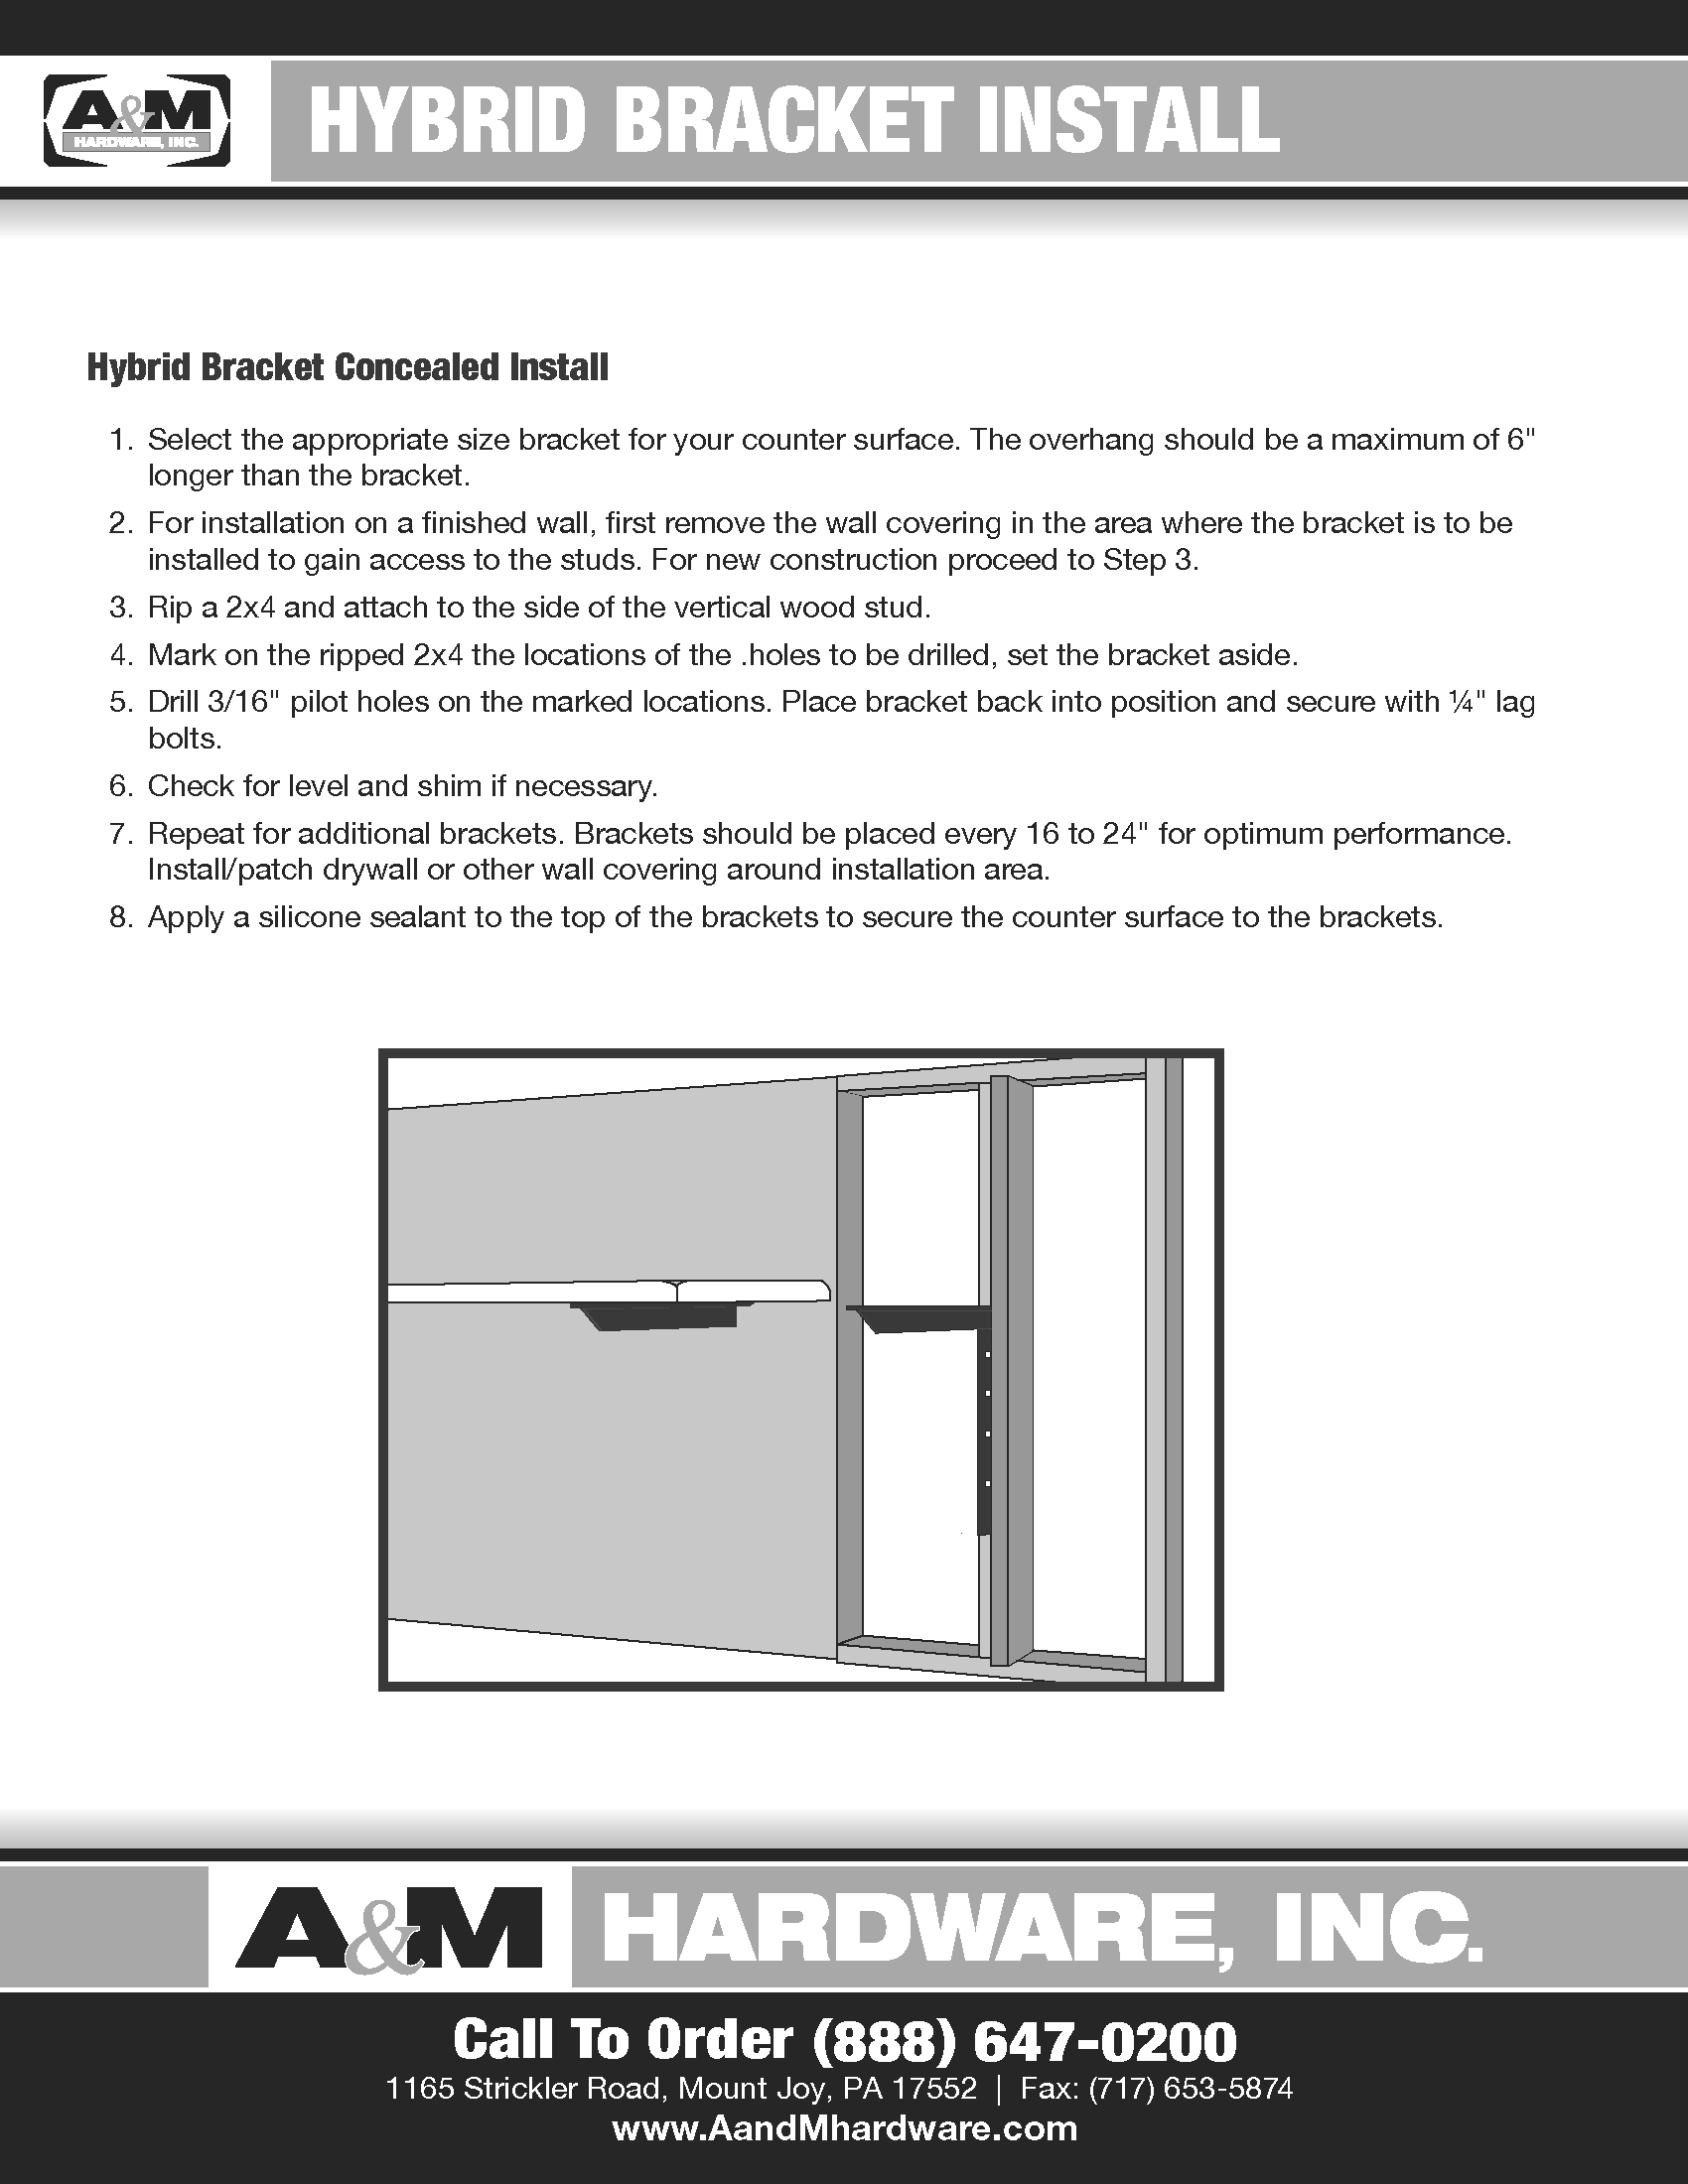
Hybrid Bracket Concealed Installation
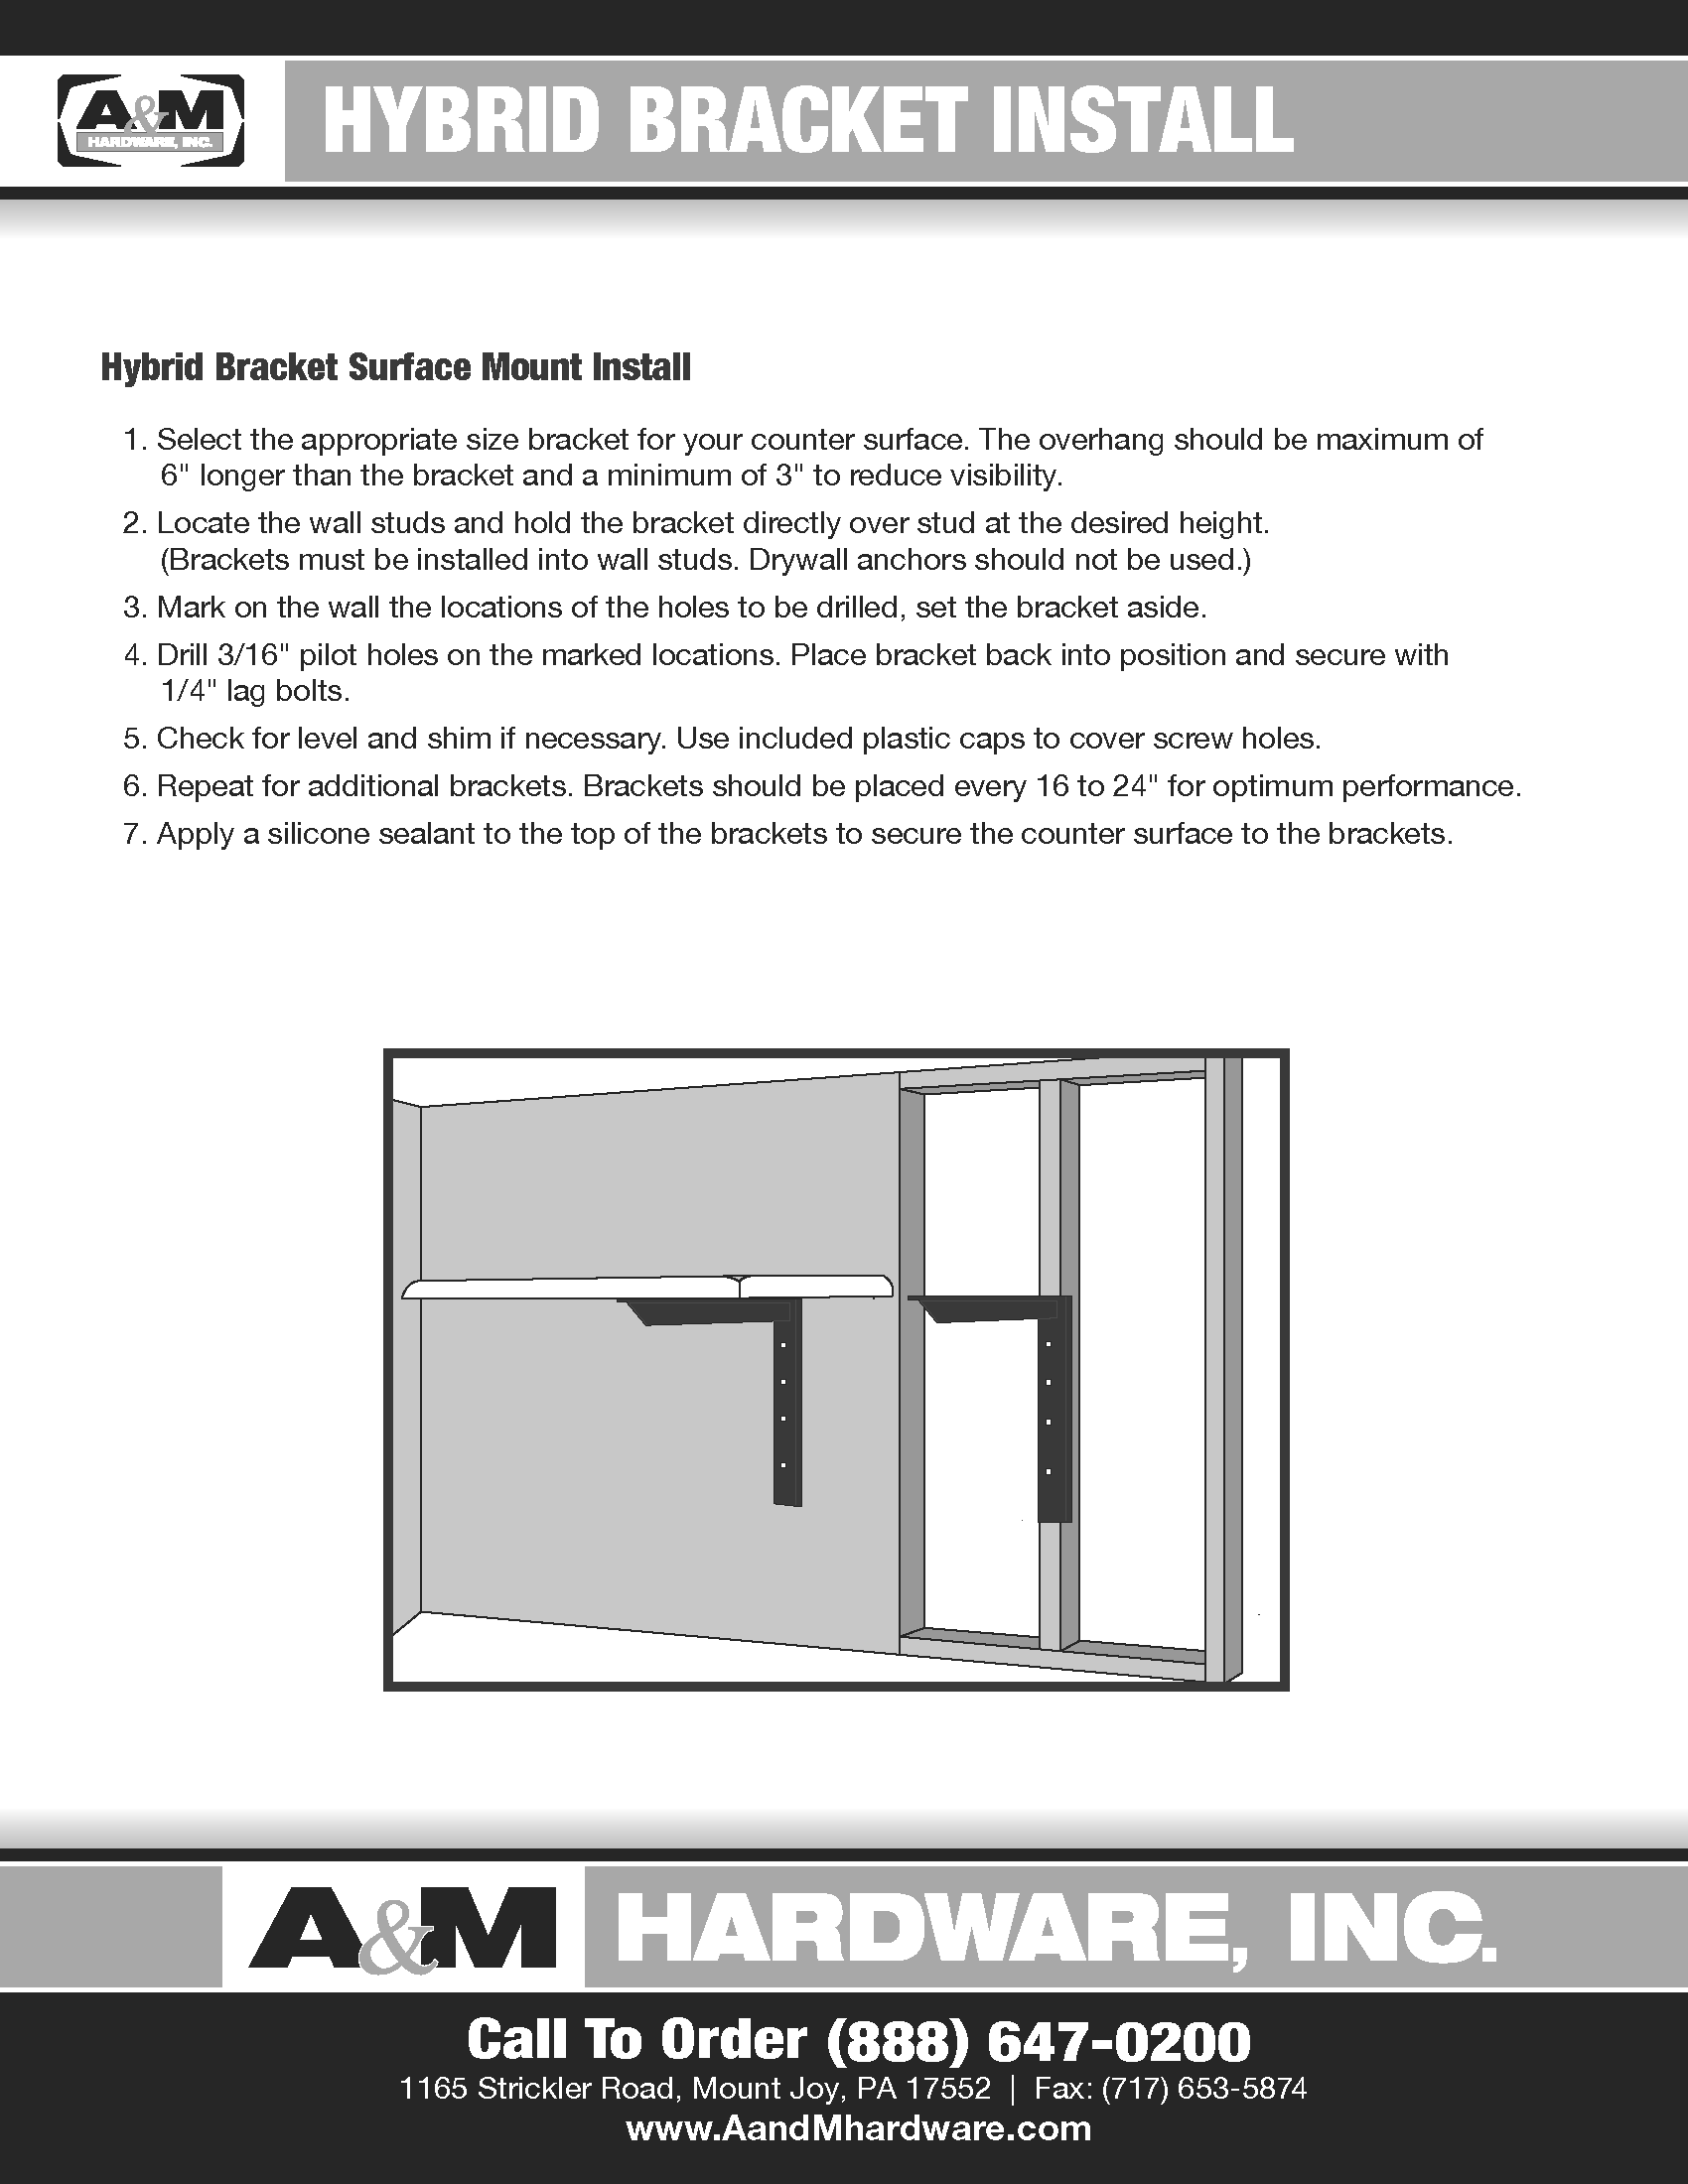
Standard Bracket Installation